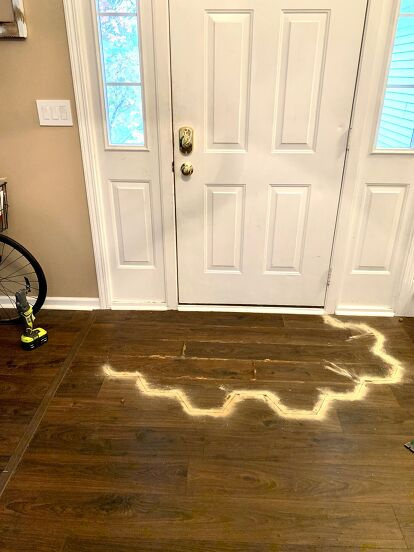
With the tiles down where I wanted them, I took a Sharpie marker and drew right on the floor to make an outline of this plan. I made sure to trace along the tiles’ edge generously, leaving myself some extra space so I could adjust the tiles slightly if I needed. This would also give me room to caulk between the tiles and the existing flooring, just like I would grout the spaces between the tiles themselves.
With this outline done, I carefully moved the tiles back to a pile.
Step 2: Cut out old flooring. This part was messy and gross. But, if your flooring isn’t saturated in cranky old cat spite, you’ll probably be fine. Moving along my traced line, I used my oscillating saw tool to cut the old flooring. This little tool is definitely one of my favorites, and it’s easy to get nice clean cuts in all those hexagon corners.
You can also use a circular saw to cut the long, straight cuts. If you do this, make sure the depth is set to only cut through your flooring and NOT into the subfloor. I used a circular saw thusly when doing our kitchen, and it’s certainly faster! For this project, however, my circular saw was out of commission. 🤦♀️ Oh, well. For all the corners and the places right next to the wall/door, I needed my oscillating tool anyway.
Once my cutting was complete, I used a hammer and pried up one of the boards along my cut line. From there, it was easy to disassemble and remove the flooring – like taking apart a puzzle. I had a garbage bag ready nearby, so I shoved the old flooring into the bag, swept up any debris, and hauled the bag out to the trash. So long, ruined floor!
Step 3: Apply waterproofing. In my kitchen, I’d covered the whole space with Schluter Ditra membrane for total waterproofing. But, that was a bit expensive and seemed overkill for just a little entry space. As an alternative, I had some scrap Schluter Kerdi membrane (much thinner and cheaper) and a lot of AquaDefense liquid membrane left from my bathroom remodel, so I decided to try laying down the Kerdi and then applying a few coats of the liquid membrane on top of that.
After sweeping and making sure the floor was clean, I spread the Kerdi over the space, grabbed a disposable brush, and painted on the AquaDefense. It went on nice and thick, acted a bit like glue to hold the Kerdi in place, and I only had to wait about an hour between coats. Did I have to do 2 coats? Probably not, but I liked getting the surface nice and even.
👇 Keep reading to know mor, click Next 👇